

How to animate react page transitions
Animated react page transition with react router 6 and framer motion


Have you ever wanted smooth page transition in your react app ? For me, the answer is HELL YES ! Not long ago I spent so much time on this matter and tried so many different npm packages and different libraries, even tried to create my own solution but I got nowhere. But lately I've started using framer motion, and realized with some short lines of code, You can easily create awesome page transitions.
Before getting into codes, I want to further explain the issue and dive deeper into this topic.
Why should we use framer motion ?
The answer may not be simple but I try my best to explain it to you. It all goes back to react components lifecycle. While a component is getting mounted (our react pages are basically react components too), You can easily animate it using css, because as component is getting painted on the screen, all the css will be applied to it and everything is nice and smooth. But this is not simply the case when the component is unmounting, look at the following diagram 👇

In the first three steps, we have access to the react component. As long as component is mounted, We can animate it, update it and generally do whatever we like, But as soon as component is unmounted (in our case, route has been changed and page component is unmounted), react removes the component from the DOM instantly, and there is no time for us to add exit animation to the component, so your component will look like this 👇

As you can see, we have smooth animation on mount, but as soon as we press unmount, React removes the component from the DOM and we don't get a chance to show exit animation. Here framer motion comes to our help, with some configuration we will be able to add smooth exit animation to our component 👇

Although our component is unmounted, but framer motion take in control and add exit animation, So we don't need to worry about anything ! Now that you understand the necessity of using framer motion, Let's get to our react project and see everything in action.
Start building our app
You can access the source code of this project on codesandbox If you want to code along, You can use
src/starterdirectory, otherwise you can access the final version insidesrc/final
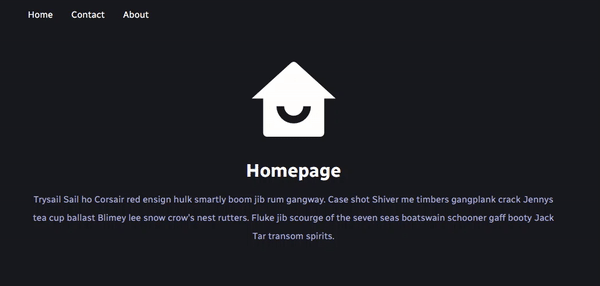
We are going to build a simple react app with a few routes, and then animate page transitions, here is the final form of our app 👇
Here is the quick explaination of the project structure :
Run the project : open codesandbox and open
src/starterdirectory/components : There is only one component here which is our
Navigation, so we can easily change routes./pages :
Contact,HomeandAboutare components which are served as Route elements, and each of them is wrapped withAnimatedLayoutwhich is the component that handles page transitions later on.AppLayoutis our global layout shared across all routes. We render all the routes insideAppRoutesand then import it insideApp.js.
Now it's time to tell framer motion that we want to animate our page
transitions, We do that by opening /pages/AppRoutes. We must put all our
routes inside AnimatePresence component which will be imported from framer
motion, Your AppRoutes will be looked like this 👇
import { Home, About, Contact, AppLayout } from '.'
import { Routes, Route } from 'react-router-dom'
import { AnimatePresence } from 'framer-motion'

export const AppRoutes = () => {
  return (
    <AnimatePresence>
      <Routes>
        <Route path="/" element={<AppLayout />}>
          <Route index element={<Home />} />
          <Route path="contact" element={<Contact />} />
          <Route path="about" element={<About />} />
        </Route>
      </Routes>
    </AnimatePresence>
  )
}
But how does framer motion going to know that a route is changed to trigger the
exit animation ? The answer is easy, We import useLocation() from
react-router-dom, and use it as a key value on our Routes component, so
whenever the key value is changed, framer motion will trigger the exit
animation, here is the final form of our AppRoutes 👇
import { Home, About, Contact, AppLayout } from '.'
import { Routes, Route, useLocation } from 'react-router-dom'
import { AnimatePresence } from 'framer-motion'

export const AppRoutes = () => {
  const location = useLocation()

  return (
    <AnimatePresence exitBeforeEnter initial={false}>
      <Routes location={location} key={location.pathname}>
        <Route path="/" element={<AppLayout />}>
          <Route index element={<Home />} />
          <Route path="contact" element={<Contact />} />
          <Route path="about" element={<About />} />
        </Route>
      </Routes>
    </AnimatePresence>
  )
}
You notice that we also added exitBeforeEnter and initial={false}, By using
exitBeforeEnter, framer motion will trigger the exit animation, and only when
exit animaiton is finished, it will trigger intro animation of the destination
route, so don't forget to add exitBeforeEnter.
initial={false} is optional and it disables the animation as users land on our
app, but as soon as they start navigating through our app, all animations will
be triggered.
QUICK REMINDER BEFORE YOU GO FURTHER: Each of
Home.jsx,About.jsxandContact.jsxis wrapped withAnimatedLayout, This way you can easily change all transitions by updating a single component.
Now that we have completed our AnimatedLayout, it's time to create
AnimatedLayout component. We share this component across our pages so we can
easily animate transitions without writing repetitive codes. Initial
AnimatedLayout looks like this
export const AnimatedLayout = ({ children }) => {
  return (
    <div>
      <div className="container">{children}</div>
    </div>
  )
}
it receives children as prop and render them inside a container, now by
animating AnimatedLayout, all it's children will be animated too 👇
import { motion } from 'framer-motion'

export const AnimatedLayout = ({ children }) => {
  return (
    <motion.div
      initial={{
        scale: 0.8,
        opacity: 0,
      }}
      animate={{
        scale: 1,
        opacity: 1,
      }}
      exit={{
        scale: 0.8,
        opacity: 0,
      }}
      transition={{ duration: 0.3 }}
    >
      <div className="container">{children}</div>
    </motion.div>
  )
}
We imported motion and created a motion.div, which allows us to start
animating, initial is where your animation starts and animate is where your
animation ends, And finally exit will be triggered on component's unmount.
Remember, all our routes are wrapped inside
AnimatePresence, inAppRoutes.jsx. Long story short, If you want to animate components onunmount, You must wrap them insideAnimatePresence, otherwise it's not gonna work.
Congratulations 🎉 You have successfully animated your page transitions. We've only touched the surface of framer motion in this article, and you can build and animate incredible stuff with framer motion. Stay safe and keep coding 🔥